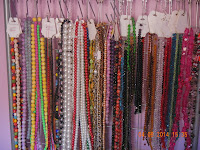
Last night I gave my first official jewellery
making class. I have included the instructions in this blog so you can make
your own.
To set up for your own project, here are a few
things to have ready.
1. A basic
idea of what you want to make! We made stackable bracelets in glass pearl beads
on an elastic. (3 bracelets)
2. A clean
work surface with enough space to spread out a little. The dining room table is
always good.
3. A dustbin
for your cut offs
4. Your
beading tray
5. Your beads
and charms
6. A tape
measure
7. Your
beading elastic
8. Thread
holder, this can be a spring or even a large paper clip
9. Crimp bead
covers
10. Scissors
11.Flat nose
pliers
12. Bead pin
(to make sure the holes are open)
13.Time
14.Magnifying
glass (optional, to find all the beads that drop on the floor!)
Once you know
what you want to make, and which colours you want to use, get your beads ready. Never
go shopping for beading supplies without an idea of what you want to make, otherwise you land up with beads you may never use! (I have a large collection
of those)
Gather all your
things together and make yourself comfortable.
Measure your
wrist to get an estimate of how large your bracelet needs to be. The beads
on the finished project will measure slightly larger than your wrist because
you measure without the beads. Most
women’s wrists measure 17cm (about 6-7 inches), then add 1,5 cm (1/2 inch)to
account for the beads. For a young girl the average is 15,5cm (about 5-6
inches) and for a man 20 cm (7-8) inches.
Take your
elastic and, using the scissors, cut your elastic to around 8 cm (4 inches) more
than you need i.e if you need 18,5cm for your bracelet add another 8 to
that (7,5 inches+ 4 inches)). Place your clamp at one end, about 4 cm (1 ½ inches) in (you need the extra length to tie
your knots).
Arrange your
beads on your bead tray in the pattern that you want. If you are using one
colour just lay the beads out.
As we used the
glass pearl beads which are inexpensive and perfect for a first project, they
don’t always have their holes open and you will need to put the bead pin
through them all, otherwise you will struggle when stringing them.
Thread all your
beads onto your elastic. You will definitely drop a few onto the floor it is
inevitable! Leave another 4 cm (1 ½
inches) at the end.
Before your
finish off make sure the bracelet fits you the way you want, by also threading the
end into the clamp. Once you are happy with it, tie it off.
Take off the
clamp at the other end and you are ready to tie your knot. You need to tie at
least three ordinary knots to make it secure. Or a surgeons knot, to do this
take the two ends and cross one behind the other to make a circle, bring the
front thread through the back of the
circle to the front and then through again. Pull tight. Cut the extra thread
off close to the knot and discard the off cuts.
Take a crimp cover
and place it over your knot with the open end facing what will be the inside of your bracelet and
using the pliers close the bead. You may
need to align the ends after you have closed the bead to make it lie flush. To
do this place the point of the pliers on the side and gently close, the crimp
bead should then move into place.
When making the
bracelet with the charm in the centre you will loop the elastic through one
side and knot and crimp it before you thread your beads. You will not need the
clamp as the charm will keep the beads from falling off while you work. When
you have enough beads on, loop the elastic through the other end of the charm
and tie a knot and cover it with your crimp bead.
Your bracelet is
now ready to wear. To make stackable bracelets you would then make as many as
you need following the instructions.
Kits will be available in my shop on Monday 8th and they have enough beads to make 3 bracelets
and are available in different colours.


